Invisalign vs. Braces in Annapolis: Which Option Fits Your Lifestyle and Your Smile?

Thinking About Straightening Your Teeth?

If you have been considering a straighter smile, you are not alone. Many adults and teens in Annapolis want teeth that look more aligned, feel easier to clean, and function better when chewing. The big decision usually comes down to two paths, Invisalign clear aligners or traditional braces.

Both options can create excellent results. However, they work differently, they feel different day to day, and they fit different lifestyles. Below is a clear, patient-friendly breakdown so you can understand what to expect and make a confident choice.

How Invisalign Works

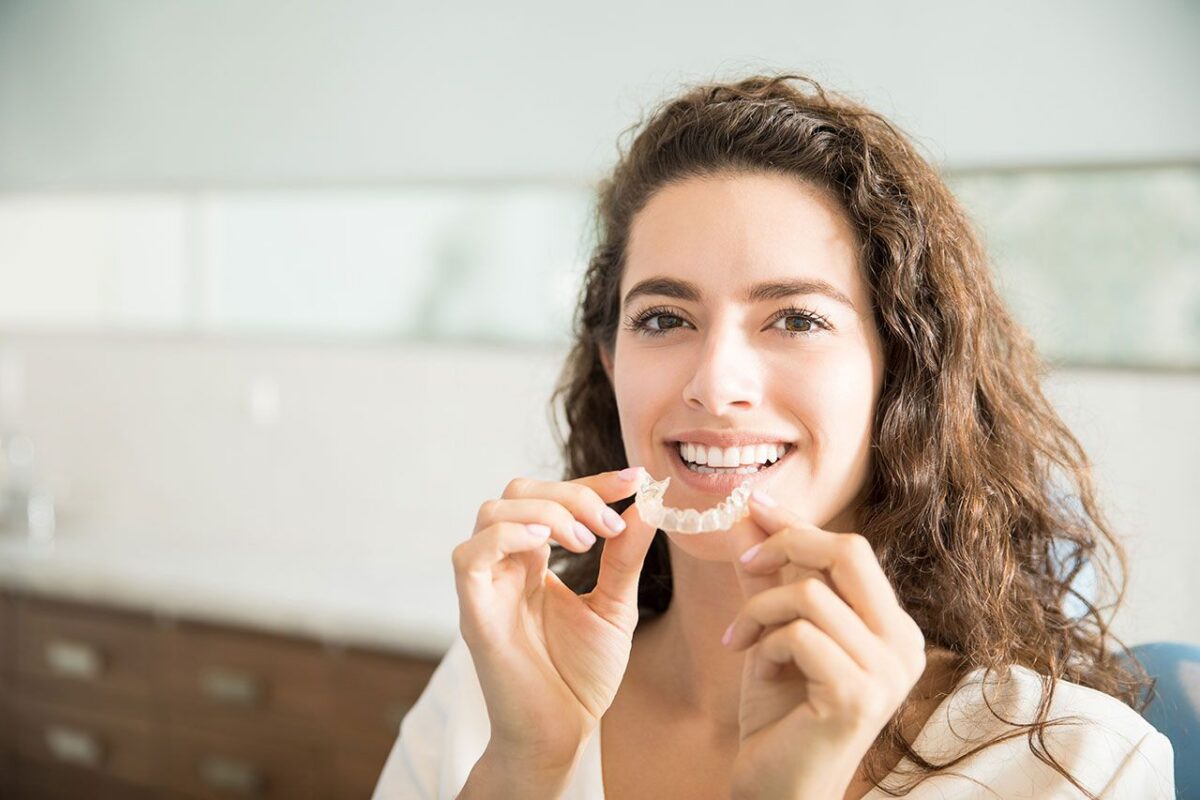
Invisalign uses a series of custom clear aligners that gently move teeth over time. You wear each set for a set period, then you switch to the next set in the series. Because aligners are removable, you can take them out to eat and to brush and floss.

Many patients like Invisalign because it blends into everyday life. In addition, visits can be quick and focused, since you are progressing through a planned series rather than adjusting wires.

What It Feels Like

Most patients describe Invisalign pressure as a tight, “snug” feeling when starting a new aligner. This pressure usually settles within a day or two. If attachments are used, you might notice slight roughness at first, yet it becomes routine quickly.

Best Fit For

Invisalign is often a great fit if you want:

  • A discreet option for work, school, or photos
  • Fewer food restrictions
  • Easier brushing and flossing than with brackets
  • A plan that supports predictable, step-by-step progress

That said, Invisalign success depends heavily on wear time. For best results, aligners typically need to be worn 20 to 22 hours per day.

How Traditional Braces Work

Braces use brackets bonded to the teeth and a wire that guides movement. Your dentist or orthodontic provider adjusts the wire over time, which changes the force on the teeth. Braces are not removable, so they work continuously.

Braces are a proven option with a long track record. They also remove one major variable, you do not have to remember to wear them.

What It Feels Like

Braces can cause tenderness after adjustments, especially in the first few days. You may also experience minor irritation inside the cheeks until tissues adapt. Orthodontic wax helps with any rubbing points.

Best Fit For

Braces may be a better fit if you:

  • Prefer an option that works 24 hours a day without remembering aligners
  • Have more complex bite movements that may be more efficient with braces
  • Are concerned about losing aligners or inconsistent wear

Invisalign vs. Braces, The Key Differences That Matter Most

Choosing the right option often comes down to your lifestyle and the type of tooth movement needed. Here are the main differences most patients care about.

1) Appearance

Invisalign is clear and low-profile, so it is typically less noticeable. Braces are more visible, although ceramic brackets can be more subtle than metal.

2) Eating

With Invisalign, you remove aligners to eat, so there are fewer food restrictions. With braces, you usually avoid sticky or crunchy foods that can damage brackets or wires.

3) Brushing and Flossing

Invisalign allows you to brush and floss normally, since aligners come out. Braces require extra time and tools, such as floss threaders or interdental brushes, to clean thoroughly around brackets.

4) Comfort

Both options can cause pressure and soreness during movement. Invisalign often feels like steady pressure, while braces can cause tenderness after adjustments and occasional irritation from hardware.

5) Compliance

Invisalign requires consistent wear time. Braces are always on, so compliance is less of a factor, although keeping them clean still takes daily effort.

6) Visit Schedule

Invisalign visits may be shorter and less frequent in some cases, since progress is guided by a series of aligners. Braces typically require regular adjustment visits.

7) Complexity and Control

Both can treat many orthodontic issues. In some complex bite cases, braces may allow more direct control of certain movements. However, Invisalign has advanced significantly and can address a wide range of concerns when planned well.

What Can Both Options Treat?

Both Invisalign and braces can improve:

  • Crowding and overlapping teeth
  • Gaps and spacing
  • Mild to moderate bite concerns
  • Rotations and minor alignment shifts
  • A smile that is harder to keep clean due to tooth position

For more complex bite patterns, your consultation and imaging will determine which option is best. The goal is to choose the approach that delivers the healthiest bite and the most stable long-term result.

A Realistic Timeline, How Long Does It Take?

Treatment time varies by case. Some patients finish in as little as several months, while others need longer. Factors include:

  • How far teeth need to move
  • Whether bite correction is needed
  • Wear time for Invisalign
  • Growth factors in teens
  • Consistency with appointments and instructions

During your evaluation at Aria Dental of Annapolis, we can estimate a more specific timeline after reviewing your scan, photos, and bite.

Cost Considerations

Costs vary depending on complexity and treatment length. Invisalign and braces can be similar in cost for many cases, although some complex cases may differ. If you have dental insurance with orthodontic benefits, it may help cover part of treatment, depending on your plan.

If cost is a concern, ask about phased planning or financing options. A straighter smile is an investment, and it should feel achievable.

How to Decide, Ask Yourself These Questions

If you are stuck between the two, these questions help clarify what fits best:

  • Do I want the most discreet option?
  • Will I realistically wear aligners 20 to 22 hours per day?
  • Do I snack often, or sip coffee throughout the day?
  • Do I want fewer food restrictions?
  • Am I okay with a little extra time brushing and flossing with braces?
  • Is my bite issue complex enough that braces might be more efficient?

There is no one right answer. Instead, the best choice is the one you can stick with consistently, because consistency is what drives results.

Life After Treatment, Retainers Matter

No matter which option you choose, retention is essential. Teeth naturally want to drift over time. Therefore, wearing retainers as directed is what keeps your straight smile stable.

Many patients do well with:

  • Full-time retainer wear at first, then nighttime wear long-term
  • Clear retainers similar to Invisalign trays
  • A fixed retainer behind the front teeth in select cases

We will recommend the best retention plan based on your starting point and your final result.

Why Straight Teeth Can Be About More Than Aesthetics

A straighter smile can look great, yet it can also make daily care easier. When teeth are aligned, brushing and flossing can reach surfaces more effectively, which may help reduce plaque buildup. In addition, bite balance can improve comfort and reduce uneven wear on certain teeth.

For many patients, the most meaningful change is peace of mind, smiling in photos without overthinking it, and feeling like their smile matches how they want to show up.

Ready to Compare Invisalign and Braces?

If you want a clear recommendation based on your teeth and your goals, we can evaluate your bite, discuss options, and outline a realistic plan.

Call Aria Dental of Annapolis at (410) 280-5370 to Schedule a Consultation in Annapolis, MD.

Smile Makeover in Annapolis: How Cosmetic Dentistry Can Refresh Your Look

A Smile Makeover Should Still Look Like You


A “smile makeover” can sound dramatic. However, the best cosmetic dentistry results are often subtle: brighter color, balanced shapes, smoother edges, and a more even smile line. In other words, a smile makeover should enhance, not replace, your natural look.

If you’re considering cosmetic dentistry in Annapolis, this guide explains what a smile makeover can include, how planning works, and how to choose treatments that fit your goals, timeline, and budget.

What Is a Smile Makeover?


A smile makeover is a customized plan that combines two or more cosmetic or restorative treatments to improve the appearance of your teeth and gums. It may include:

  • Professional teeth whitening

  • Veneers or bonding

  • Invisalign or clear aligners

  • Tooth-colored fillings

  • Crowns for shape or strength

  • Gum contouring (in select cases)

  • Replacing old dental work that no longer matches your smile

The key word is customized. Some patients need only whitening and bonding. Others want aligners and veneers. The best makeover is the one that solves your specific concerns in the least invasive way.

The Smile Makeover Planning Process


Step 1: Define Your Goals


We start with your “wish list.” Are you bothered by color, spacing, chips, or uneven edges? Do you want a subtle refresh or a more noticeable change? We also consider whether you have an upcoming event, photos, weddings, or interviews, so timing can be planned realistically.

Step 2: Evaluate Health First


Cosmetic work lasts longer when the foundation is healthy. Therefore, we check:

  • Gum health

  • Cavities or leaking fillings

  • Bite balance and grinding

  • Enamel thickness and sensitivity risks

  • Old restorations that may need replacement

If there’s gum inflammation or decay, we stabilize it before moving forward.

Step 3: Choose Treatments in the Right Order


Order matters. For example:

  • If your teeth need straightening, Invisalign often comes before veneers.

  • If you want whitening, we typically whiten before choosing veneer or crown shades.

  • If you have worn edges from grinding, we consider bite protection early.

Planning the sequence prevents wasted steps and helps ensure your final smile looks cohesive.

Common Smile Makeover Combinations


Whitening + Bonding


This is a popular “natural upgrade” combo. Whitening brightens overall shade, then bonding refines chips or uneven edges. It’s often budget-friendly and conservative.

Invisalign + Whitening


If spacing or crowding bothers you, aligners can create a more balanced smile. After alignment, whitening enhances brightness for a polished finish.

Veneers (With or Without Whitening)


Veneers can change shape and shade simultaneously. They’re often ideal when multiple concerns overlap—deep stains, gaps, worn edges, or asymmetry.

Crowns + Cosmetic Refinement


If certain teeth are structurally compromised, crowns may be needed for strength. Cosmetic planning ensures crowns match the overall smile design.

How to Keep Results Natural (Not “Too Perfect”)


A natural smile has subtle variation. Teeth aren’t identical rectangles. That’s why we consider:

  • Proportions:


    Tooth width and length relative to face shape


  • Translucency:


    Slight lightness at edges for realism


  • Texture:


    Natural enamel has tiny surface textures


  • Shade Selection:


    Bright, but not flat or opaque


If you’re worried about looking “overdone,” mention it. It’s a common preference, and it guides design choices.

Timeline: How Long Does a Smile Makeover Take?


It depends on what’s included:

  • Whitening can be done quickly or over a couple of weeks.

  • Bonding is often completed in one visit.

  • Crowns and veneers usually take a few appointments.

  • Invisalign may take months, depending on complexity.

We’ll map a timeline that fits your schedule, especially if you have a deadline.

Cost and Value


A makeover can range from modest to comprehensive. While budget is important, the right question is often: Which treatments give me the biggest improvement for the least invasiveness? Many patients appreciate phased plans


,


doing the most impactful step first, then adding refinements over time.

Smile makeovers improve more than appearance. A well-planned cosmetic upgrade can restore worn edges, improve bite balance, and replace failing restorations, supporting comfort as well as aesthetics. Patients often report increased confidence in photos, conversations, and professional settings. When your smile feels aligned with how you want to show up in the world, it can influence everything from social ease to daily self-care habits.

A Smart First Step: A Cosmetic Consultation


You don’t have to decide everything at once. A consultation can clarify what’s possible, what’s optional, and what’s most effective for your goals. You’ll leave with a plan, not pressure.


Ready to explore a natural-looking smile refresh?


Call Aria Dental of Annapolis at (410) 280-5370 to Schedule a Consultation in Annapolis, MD.

Extractions in Annapolis: When a Tooth Needs to Come Out and What Healing Looks Like

Sometimes Removing a Tooth Protects the Rest of Your Smile


Most people want to avoid losing a tooth—and that’s a reasonable goal. However, there are times when a tooth is too damaged to repair predictably. In those cases, an extraction can relieve pain, stop infection, and protect neighboring teeth and bone.

If you’re facing a tooth extraction in Annapolis, this guide will help you understand why extractions are recommended, what the appointment is like, and how to heal smoothly afterward.

Common Reasons for Tooth Extractions


A tooth may need to be removed when:

  • Decay has destroyed too much structure to restore

  • A crack extends below the gumline or into the root

  • Infection is severe and the tooth can’t be saved

  • Gum disease has loosened the tooth

  • A tooth is overcrowded or blocking orthodontic treatment

  • A wisdom tooth is impacted or repeatedly inflamed

Whenever possible, we explore conservative options first. Still, when saving the tooth would be unpredictable or risk repeated infection, extraction becomes the healthier option.

Simple Extraction vs. Surgical Extraction


Simple Extraction


A simple extraction is performed when the tooth is visible above the gumline and can be removed with gentle instruments. Most routine extractions fall into this category.

Surgical Extraction


Surgical extraction is used when a tooth is broken at the gumline, impacted, or difficult to access. It may involve a small incision and sometimes sectioning the tooth for safe removal.

The approach is chosen based on anatomy, tooth condition, and imaging—so treatment is controlled and comfortable.

What to Expect During the Appointment


Step 1: Numbing and Comfort


We begin with a topical anesthetic, followed by local anesthetic. If you’re anxious, let us know. Comfort matters, and we can discuss options that help you feel more at ease.

Step 2: Gentle Removal


Once numb, the tooth is loosened carefully so it can be removed with minimal stress on surrounding bone. You may feel pressure, but not sharp pain.

Step 3: Stabilizing the Site


After removal, we clean the socket and place gauze to help a clot form. In some cases, sutures may be used. If infection is present, we’ll discuss follow-up care.

Step 4: Replacement Planning (If Needed)


If the tooth is in a visible or functional area, we’ll discuss replacement options such as implants, bridges, or partial dentures. In addition, timing matters—some cases are ideal for immediate implant planning.

The Most Important Part: Protecting the Blood Clot


Healing after an extraction depends on the blood clot that forms in the socket. If the clot is lost too early, a painful condition called dry socket can occur. Therefore, the first 72 hours matter the most.

Do This After an Extraction


  • Bite on gauze as directed to control bleeding

  • Rest and keep your head slightly elevated

  • Use cold compresses for swelling

  • Stick to soft foods (yogurt, eggs, smoothies, soup once warm—not hot)

  • Rinse gently with salt water after 24 hours

  • Take medications exactly as recommended

Avoid This (Especially in the First 72 Hours)


  • Smoking or vaping (major dry socket risk)

  • Drinking through a straw

  • Spitting forcefully

  • Vigorous rinsing

  • Crunchy, sharp foods that can disturb the site

Normal Healing Timeline


Day 1–2


Mild bleeding and soreness are common. Swelling may peak around day 2. Rest and soft foods help.

Day 3–5


Discomfort typically begins to decrease. If pain worsens suddenly around day 3, call us—this can be a sign of dry socket.

Week 1


Tissues begin closing over. Some tenderness may persist, but chewing becomes easier.

Weeks 2–4+


Bone remodeling continues internally for weeks to months. If you plan an implant, healing and timing will be coordinated carefully.

Pain Control: What Works Best


Most patients do well with over-the-counter pain relievers when used safely. Cold compresses and rest also help. Meanwhile, avoid intense exercise for the first day or two, since it can increase bleeding and swelling.

If you have any medical conditions or medications that affect healing, tell us beforehand so we can tailor instructions.

What About Bone Grafting?


In some cases, we may recommend a socket graft after extraction to preserve bone volume. This is common when you want a future dental implant. Because bone can shrink after tooth loss, grafting can maintain a better foundation for replacement.


Tooth extractions remove sources of infection, relieve persistent pain, and protect surrounding teeth and bone from damage. When performed with proper planning and aftercare, extractions also create a clean path for tooth replacement—such as a dental implant or bridge—so you can restore comfortable chewing and a confident smile with predictable long-term results.

If You’re Nervous, You’re Not Alone


Dental anxiety is extremely common. The best first step is sharing your concerns so we can support you. We’ll explain each step, keep you comfortable, and give clear aftercare instructions so you know exactly what to do at home.

Ready for Relief and a Clear Plan?


If you have a tooth that’s painful, infected, or beyond repair, we’ll help you understand your options and next steps. Call Aria Dental of Annapolis at (410) 280-5370 to Book an Appointment in Annapolis, MD.

Dental Veneers in Annapolis: A Natural-Looking Smile Upgrade Without “Overdoing It”

Veneers Can Look Incredibly Natural—When They’re Done Right


Porcelain veneers have a reputation for creating dramatic transformations. Still, the best veneer cases often look like “you—on your best day.” If you’ve been considering veneers in Annapolis but worry about a too-white or too-uniform result, you’re not alone. The key is customization: shape, shade, translucency, and proportion are all designed to match your facial features and personality.

This guide explains what veneers can fix, how the process works, and how to decide whether veneers—or another cosmetic option—fits you better.

What Are Porcelain Veneers?


Porcelain veneers are thin, custom ceramic shells bonded to the front of teeth. They can refine:

  • Color (covering deep stains)

  • Shape (smoothing chips or uneven edges)

  • Symmetry (making teeth look more balanced)

  • Minor spacing (closing small gaps)

  • Minor alignment concerns (creating the appearance of straighter teeth)

Because veneers cover only the front surface, they can be a conservative cosmetic option compared with full crowns—when the underlying tooth is healthy.

Common Reasons People Choose Veneers


1) Deep Stains That Don’t Respond to Whitening


Some discoloration is intrinsic (inside the tooth) and won’t lift much with whitening. Veneers can mask that discoloration while still looking lifelike.

2) Chips, Edge Wear, and “Short” Teeth


Grinding and years of chewing can shorten teeth. Veneers can restore length and create a brighter, more youthful look—without looking artificial.

3) Small Gaps and Uneven Spacing


For minor spacing issues, veneers can close gaps in a controlled way while preserving a natural tooth-to-tooth rhythm.

4) Shape Concerns


Some teeth are naturally narrow, rounded, or slightly different in size. Veneers can improve proportion and symmetry.

5) A “Smile Refresh”


If you want a cohesive, polished look—without braces—veneers can be a strong option depending on your bite and enamel health.

Veneers vs. Bonding vs. Whitening: What’s the Difference?


Whitening


Best for lifting overall shade when stains are mostly external. Whitening won’t change shape or close gaps.

Composite Bonding


Bonding can repair chips and refine shape quickly and affordably. However, bonding can stain more than porcelain and may need touch-ups sooner depending on habits and bite forces.

Veneers


Veneers combine long-term stain resistance with shape refinement. They can be ideal for a more comprehensive aesthetic upgrade—especially when multiple concerns overlap.

The Veneer Process: Step by Step


Step 1: Consultation and Smile Planning


We discuss your goals and assess enamel, gums, and bite. Then we plan a shade and shape that fits your face and looks natural in different lighting. In addition, we consider your smile line so the final result complements how you naturally speak and laugh.

Step 2: Minimal Preparation


A thin layer of enamel is shaped to create room for the veneer. This helps the veneer sit flush rather than bulky. Some cases require extremely minimal prep, while others require more—depending on alignment and existing tooth structure.

Step 3: Digital Impressions and Temporary Veneers


We take impressions or scans that guide the lab. Temporaries often allow you to “test drive” your smile. This is where we can fine-tune length and overall feel.

Step 4: Final Placement


After try-in and adjustments, veneers are bonded and polished. Bite is checked carefully to avoid premature contact that could chip porcelain.

“Will I Have to Get Veneers Forever?”


This is a common and fair question. Veneers are a long-term restoration, and they may eventually need replacement. However, with good care, many veneers last for years and years. The best approach is to view veneers as an investment that benefits from maintenance—much like a car or a home.

How to Care for Veneers


  • Brush and floss daily (yes, you still floss)

  • Avoid very abrasive toothpaste

  • Don’t use teeth to open packages

  • Wear a night guard if you grind or clench

  • Keep regular exams so margins are monitored

Even though porcelain is stain-resistant, bonding edges can discolor slightly over time. Therefore, routine cleanings and polishing help preserve a crisp look.

Choosing a Shade That Looks Real


The brightest shade isn’t always the best. Natural smiles have subtle depth and translucency, especially near edges. We’ll help you choose a shade that looks fresh and natural, not flat or opaque. In addition, we’ll consider your skin tone and eye color so the result harmonizes.

Who Might Not Be an Ideal Candidate?


Veneers may not be the first choice if you have:

  • Active gum disease

  • Significant decay

  • Severe grinding without protection

  • Bite problems that place excessive force on front teeth

  • Very little enamel (bonding strength matters)

In those situations, we may recommend orthodontics, crowns, or a protective treatment plan first.


Porcelain veneers can create a natural-looking upgrade by refining color, shape, and symmetry in a conservative way. Because porcelain reflects light similarly to enamel, veneers can look lifelike and photo-friendly. Many patients also find that a refreshed smile improves confidence in social settings and motivates consistent oral care—helping protect results long-term.

If You’re Curious, Start With a Conversation


The best veneer plan is the one that looks like you, only brighter and more balanced.


Call Aria Dental of Annapolis at (410) 280-5370 to Schedule a Consultation in Annapolis, MD.

Dental Crowns in Annapolis: When You Need One, What to Expect, and How to Make It Last

A Crown Is Often the “Save the Tooth” Solution


When a tooth is too damaged for a filling—yet still worth saving—a


dental crown


is often the best next step. Crowns protect weakened teeth, restore chewing strength, and blend naturally with your smile. Still, if you’ve never had one, you might wonder: Does it hurt? How long does it take? Which material is best?


Below is a patient-friendly guide to dental crowns in Annapolis, including how crowns work, the most common reasons you might need one, and practical tips to help your crown last for many years.

What Is a Dental Crown?


A crown is a custom “cap” that covers the visible portion of a tooth above the gumline. It restores the tooth’s shape, strength, and function. Because it wraps around the tooth, it protects cracked enamel and stabilizes large restorations that might otherwise fracture under bite pressure.

Crowns can be made from different materials—such as ceramic, zirconia, porcelain-fused-to-metal, or gold—depending on your bite and cosmetic goals.

Common Reasons You Might Need a Crown


Crowns aren’t only for “bad teeth.” In fact, they’re often recommended to protect a tooth before it becomes a bigger problem.

1) A Large Cavity or Large Filling


If a cavity is extensive, a filling may leave the remaining tooth walls thin. As a result, chewing forces can crack the tooth around the filling. A crown provides coverage that reduces fracture risk.

2) A Cracked or Fractured Tooth


Cracks can spread like a tear in fabric. If the crack involves cusps or multiple walls, a crown can bind the tooth together and protect it from splitting.

3) After Root Canal Therapy


Root canal therapy removes inflamed tissue inside the tooth, which can leave it more brittle. Therefore, crowns are commonly used afterward to protect the tooth from fracture and restore full bite function.

4) Worn-Down Teeth from Grinding


If you clench or grind, teeth can flatten and weaken. Crowns can rebuild height, restore bite balance, and protect remaining structure—especially when paired with a night guard.

5) A Cosmetic or Shape Correction


In select cases, crowns can correct tooth shape, alignment, or discoloration when more conservative options aren’t a fit. However, veneers or whitening may be considered first depending on your goals.

Crown Materials: Which Is Best?


There isn’t one “best” crown—there’s the best crown for your tooth.

All-Ceramic (Porcelain)


Ceramic crowns can look extremely natural and are often used for front teeth where esthetics matter most. They can also work well on many back teeth, especially when bite forces are moderate.

Zirconia


Zirconia is known for strength and durability, making it popular for molars and patients who grind. Modern zirconia can also look very natural, with improved translucency compared to older versions.

Porcelain-Fused-to-Metal (PFM)


PFM crowns have a metal substructure with a porcelain exterior. They can be strong, although the porcelain layer may chip in some cases. Additionally, some patients may notice a dark line near the gumline over time if gums recede.

Gold (and High-Noble Alloys)


Gold crowns are exceptionally durable and gentle on opposing teeth. They’re less common today due to appearance, yet they remain one of the longest-lasting options for certain back teeth.

Your dentist will recommend a material based on your tooth location, bite, cosmetic preference, and history of grinding.

What To Expect During the Crown Process


Step 1: Exam and Planning


We evaluate the tooth, review X-rays, and confirm that a crown is the most predictable option. If the tooth has deep decay or nerve symptoms, we may discuss root canal therapy first.

Step 2: Numbing and Tooth Preparation


We numb the area so you stay comfortable. Then we shape the tooth so the crown can fit over it. The goal is to remove only what’s necessary while creating a smooth, stable foundation.

Step 3: Impression or Digital Scan


A precise impression (or digital scan) captures your tooth and bite relationship. This is important because a crown should feel natural when you chew and speak.

Step 4: Temporary Crown


You’ll wear a temporary crown while your final crown is fabricated. Temporaries protect the tooth and maintain spacing. However, they’re not as strong as the final, so avoid sticky foods and chew cautiously on that side.

Step 5: Final Crown Placement


At your delivery visit, we remove the temporary, clean the tooth, and try in the final crown. We check fit, bite, and shade. Then we cement it in place and make small adjustments so it feels right.

How Long Do Crowns Last?


Many crowns last 10–15 years or longer, and some last significantly longer with excellent care. Longevity depends on:

  • Bite forces and grinding habits

  • Oral hygiene and gum health

  • Diet (frequent sugar and acid exposure increases risk)

  • Crown material and fit

  • Whether the tooth was severely compromised before the crown

In other words, a crown is durable—but it still benefits from good habits and routine monitoring.

Caring for Your Crown: Practical Tips


Brush and Floss Like It’s a Natural Tooth


Crowns don’t decay, but the tooth underneath can. The most common crown issue is decay at the margin near the gumline. Therefore, brush along the gumline and floss daily.

Consider a Night Guard


If you grind, a night guard protects both your crown and neighboring teeth. This is especially important for patients who have fractured teeth in the past.

Avoid Extreme Chewing Habits


Ice chewing, hard candies, and using teeth as tools can chip porcelain and stress the tooth. If you want your crown to last, treat your teeth like teeth—not scissors.

Keep Regular Checkups


A crown can feel fine even if a margin begins to leak. Routine exams help catch issues early, when repairs are simpler.

What About Sensitivity After a Crown?


Mild temperature sensitivity for a few days is common, especially if the tooth was deeply restored. It should improve steadily. Call us if:

  • Pain is worsening or throbbing

  • You have pain when biting that doesn’t fade

  • The crown feels “high” or your bite feels off

  • Sensitivity lingers longer than a couple of weeks

Often, a small bite adjustment solves the problem quickly.

Crown vs. Onlay vs. Filling: How We Choose


  • Filling:


    Best for small-to-moderate cavities with strong surrounding enamel.

  • Onlay:


    A conservative option when one or more cusps are weakened but the whole tooth doesn’t need coverage.

  • Crown:


    Best when the tooth needs full protection due to cracks, large restorations, or post-root canal needs.

The guiding principle is protection with preservation—using the least invasive option that reliably prevents future fracture or reinfection.

Dental crowns restore strength, protect cracked or weakened teeth, and help you chew comfortably without fear of breaking a fragile tooth. In addition, a well-fitted crown can improve bite balance, reduce sensitivity, and preserve natural tooth structure that might otherwise be lost to fracture or extraction. With good hygiene and regular care, crowns can be a long-term investment in a healthier, more confident smile.

Ready to Protect a Tooth Before It Becomes a Bigger Problem?


If you have a tooth that’s cracked, heavily filled, or painful when you bite, an evaluation can clarify whether a crown is the right next step.


Call Aria Dental of Annapolis at (410) 280-5370 to Schedule a Consultation in Annapolis, MD.


Dentures in Annapolis: Your Options, Your Fit, and How to Feel Confident Again

If You’re Missing Teeth, You’re Not Out of Options


Tooth loss can affect the way you chew, speak, and smile. It can also change how you feel socially—especially if you worry a denture might slip or click. The good news is that denture solutions have come a long way. Today,


dentures in Annapolis


can be customized for comfort, appearance, and stability, and they can be paired with implants for a stronger, more secure fit.


This guide covers the main types of dentures, what the process looks like, and how to choose a solution that matches your lifestyle.

The Main Types of Dentures


Full Dentures


Full dentures replace all teeth in the upper jaw, lower jaw, or both. They rest on the gums and are shaped to fit your mouth’s contours. Upper dentures often stay in place more easily due to suction; lower dentures can be trickier because the tongue and floor of the mouth move constantly.

Partial Dentures


If you still have healthy natural teeth, a partial denture fills in gaps and can help prevent shifting. Many partials use discreet clasps or precision attachments to stay secure. Because partials rely on remaining teeth for support, keeping those teeth healthy is essential.

Immediate Dentures


An immediate denture is placed right after extractions, so you don’t have to go without teeth during healing. However, as gums shrink during healing, immediate dentures usually need relines and adjustments. Think of them as a “transitional smile” that keeps you functional and confident while tissues settle.

Implant-Supported Dentures


Implant-supported dentures are a major upgrade in stability. Instead of relying solely on suction or adhesives, the denture attaches to implants placed in the jaw. This approach can reduce slipping and improve chewing confidence. Depending on your plan, the denture may “snap” on and off for cleaning or be fixed in place.

Traditional Dentures vs. Implant-Supported: What’s the Difference?


Both options can look natural and restore function. The difference is how they feel day-to-day.

Stability


  • Traditional dentures:


    Can shift, especially on the lower arch.

  • Implant-supported dentures:


    Anchor firmly, reducing movement and improving comfort.

Chewing Confidence


  • Traditional dentures:


    Often require softer foods at first and can feel less powerful for tougher textures.

  • Implant-supported dentures:


    Typically allow a broader diet and better bite efficiency.

Bone Support


  • Traditional dentures:


    Without tooth roots or implants, bone can shrink over time.

  • Implant-supported dentures:


    Implants stimulate bone, helping preserve jaw structure.

Maintenance


  • Traditional dentures:


    Require cleaning, soaking, and periodic relines.

  • Implant-supported dentures:


    Also require cleaning and maintenance, but often need fewer relines over time.

The Denture Process: What to Expect


Every denture is custom. Therefore, the process matters as much as the final product.

Step 1: Comprehensive Exam and Planning


We evaluate gum health, bone levels, bite, and any remaining teeth. If extractions are needed, we plan timing and discuss immediate vs. conventional dentures. If implants are part of your plan, we may recommend 3D imaging for accurate placement.

Step 2: Impressions and Measurements


We take impressions (or digital scans) and record how your jaws relate when you bite. This is critical for speech and comfort. In addition, we review smile line and tooth shape preferences so your denture looks natural in photos and conversation.

Step 3: Try-In Appointment


Before final fabrication, you’ll typically preview the setup—sometimes called a “wax try-in.” This is your chance to see tooth color, size, and overall smile design. Small adjustments here can make a big difference in confidence.

Step 4: Delivery and Fine-Tuning


When you receive your denture, we check pressure points, bite balance, and esthetics. The first week often involves a few adjustments as tissues adapt. This is normal—and it’s why follow-up care is part of a successful denture experience.

Step 5: Long-Term Maintenance


Gums and bone change over time, so dentures require periodic relines or replacement. Routine dental visits help keep your fit comfortable and protect oral tissues.

Getting Used to Dentures: The Realistic Timeline


It’s normal to need an adjustment period. Most patients notice steady improvement week by week.

Speaking


Some words may feel awkward initially, especially “s,” “f,” and “th” sounds. Reading aloud for 10 minutes a day helps your tongue learn the new contours quickly.

Eating


Start with softer foods in small bites. Chew evenly on both sides to keep the denture stable. Over time, you’ll return to a broader diet, especially after fit adjustments.

Comfort


Minor sore spots are common early on. However, do not “tough it out.” A quick adjustment prevents ulcers and helps you adapt faster.

Common Denture Concerns—Solved


“Will My Dentures Look Fake?”


Not when they’re designed well. We consider tooth proportions, natural translucency, and a smile that fits your facial features. A natural denture should complement you—not announce itself.

“Do I Need Adhesive?”


Some patients use adhesive for extra security with traditional dentures, especially on the lower arch. However, if you rely heavily on adhesive daily, that may signal a fit issue that needs a reline or adjustment.

“What If I Have a Gag Reflex?”


We can modify the shape and thickness to reduce triggers. In some cases, implant-supported options reduce the bulk that causes gagging.

How to Care for Dentures


  • Brush the denture daily with a soft brush and non-abrasive cleaner.

  • Rinse after meals to remove debris.

  • Soak as directed to prevent warping and drying.

  • Clean gums and tongue daily to reduce bacteria.

  • Keep regular dental visits—oral cancer screenings and tissue checks are still important.

If you have implant-supported dentures, we’ll teach you specific cleaning techniques using floss threaders, water flossers, or specialized brushes.

Modern dentures restore the ability to chew comfortably, speak clearly, and smile with confidence. For many patients, replacing missing teeth also supports facial contours and reduces the “collapsed” look that can develop with tooth loss. Implant-supported dentures add stability and can help preserve bone, making day-to-day life easier—especially for eating, socializing, and staying active.

Which Option Is Right for You?


If you want the most economical path and you have healthy gum tissue, traditional dentures may be a good fit. If you want stronger stability, fewer slipping worries, and a more secure bite, implant-supported dentures can be a game-changer. The best choice is the one that matches your anatomy, expectations, and budget.

Let’s Build a Smile You Can Trust


Whether you’re exploring your first denture or upgrading an older one, we’ll help you find a comfortable, natural-looking solution.


Call Aria Dental of Annapolis at (410) 280-5370 to Book an Appointment in Annapolis, MD.


Tooth-Colored Fillings in Annapolis: A Modern, Natural-Looking Way to Repair Cavities

Why Fillings Aren’t “One-Size-Fits-All” Anymore


When most people hear the word “filling,” they picture the old silver material that was common for decades. Today, however, dentistry has evolved.


Tooth-colored fillings


(often called composite fillings) can repair cavities and minor damage while blending naturally with your smile. As a result, many patients choose them not only for appearance, but also for conservative tooth preservation and comfort.


If you’re considering tooth-colored fillings in Annapolis—or you’re wondering whether it’s worth replacing older metal fillings—this guide breaks down how they work, when they’re recommended, and how to help them last.

What Are Tooth-Colored Fillings?


Tooth-colored fillings are made from a durable composite resin that bonds to the tooth. Unlike metal fillings that rely on mechanical retention, composite materials can adhere directly to enamel and dentin. Therefore, less tooth structure may need to be removed in certain cases, especially when repairing small-to-moderate cavities.

Composite resin is carefully shade-matched to your tooth color. In addition, it can be sculpted to recreate natural grooves and edges, helping your bite feel “normal” quickly.

When Tooth-Colored Fillings Are a Great Choice


Composite fillings can treat many common needs, including:

  • Small to moderate cavities

  • Chipped teeth


    or minor fractures

  • Worn edges


    from grinding

  • Replacing older fillings


    that are leaking or breaking down

  • Closing tiny gaps


    or smoothing uneven contours (in select situations)

That said, for very large restorations or teeth with extensive cracking, an inlay, onlay, or crown may be more predictable long-term. The goal is always the same: choose the restoration that protects your tooth best.

The Step-by-Step Process: What to Expect


If you’ve avoided fillings because you’re worried they’ll be uncomfortable, the modern experience is usually far easier than patients expect. Here’s how it typically goes.

Step 1: Diagnosis and Planning


We examine the tooth, review X-rays as needed, and confirm the size and location of decay or damage. If the cavity is close to the nerve, we’ll discuss sensitivity risks and protective liners.

Step 2: Getting Comfortable


If numbing is needed, we apply topical anesthetic first, then local anesthetic. Many small cavities can be treated comfortably with minimal anesthesia; however, we prioritize your comfort and will use what’s appropriate.

Step 3: Removing Decay Conservatively


We remove the decayed area while preserving healthy tooth structure. Because composite bonds to the tooth, we can often be more conservative than with older techniques.

Step 4: Bonding and Layering


The tooth is cleaned and prepared so the bonding agent can adhere properly. Then the composite resin is placed in layers and cured with a special light. Layering matters because it improves strength and reduces shrinkage.

Step 5: Shaping, Polishing, and Bite Check


We sculpt the final shape to match your natural tooth anatomy. Then we polish it to a smooth finish and check your bite. If something feels “high,” we adjust immediately—because a small bite discrepancy can lead to soreness.

Tooth-Colored vs. Silver Fillings: Key Differences


Appearance


Composite blends naturally, which is especially important for visible teeth. Even on molars, many patients prefer a seamless look when they laugh or yawn.

Tooth Preservation


Because composite bonds to the tooth, it can reinforce remaining structure and may require less removal of healthy enamel in certain cases.

Temperature Sensitivity


Metal fillings expand and contract more with temperature changes. Composite is closer to natural tooth structure in behavior, which may help some patients experience less sensitivity.

Longevity


Both types can last many years. Longevity depends on factors such as cavity size, bite forces, grinding habits, and home care. Large restorations may last longer when upgraded to an onlay or crown, regardless of material.

Do Tooth-Colored Fillings Contain Mercury?


Composite fillings do not contain mercury. Some patients ask this because traditional silver amalgam fillings contain a mix of metals. If you’re considering replacing older fillings, we’ll discuss the pros and cons based on your current restorations and risk factors.

Should You Replace Old Silver Fillings “Just Because”?


Not always. If a silver filling is intact, comfortable, and well-sealed, replacement may not be necessary. However, there are situations where updating old fillings is a smart move:

  • The filling is cracked, worn down, or has open margins

  • There is decay around or under the filling

  • You have a fracture line near the filling

  • You want a more natural-looking smile and the replacement is clinically reasonable

  • The tooth is sensitive and the filling appears unstable

The best approach is personalized. Sometimes leaving a stable filling alone is safest; other times, replacing it prevents a bigger problem later.

How to Help Fillings Last Longer


A filling is a repair, not armor. Still, you can dramatically extend its life with a few habits.

Brush and Floss Consistently


Cavities often form at the edges of restorations where plaque collects. Therefore, cleaning along the gumline and flossing daily is crucial.

Avoid Frequent Snacking on Sugary Foods


The frequency of sugar exposure matters as much as the amount. If you graze all day, teeth spend more time in an acidic environment. Try to keep treats to mealtimes when saliva flow is higher.

Protect Against Grinding


If you clench or grind, fillings can wear down faster or chip. A custom night guard helps distribute forces and protects both enamel and restorations.

Keep Up with Regular Exams


Routine checkups help detect small margin issues early. Catching a minor leak can mean a small repair rather than a crown.

What About Sensitivity After a Filling?


Some mild sensitivity—especially to cold—is common for a few days. It should improve steadily. However, call us if:

  • Sensitivity is getting worse instead of better

  • You have pain when biting that doesn’t resolve

  • The tooth aches spontaneously

  • The filling feels high even after a day or two

A quick bite adjustment can solve many post-filling issues.

Tooth-colored fillings repair cavities with a natural look while preserving healthy tooth structure. Because they bond to the tooth, they can support remaining enamel and reduce the need for larger restorations in many cases. Additionally, modern composite techniques allow precise shaping for comfortable biting and easy cleaning—helping patients maintain healthy smiles with confidence.

A Practical Next Step


If you suspect a cavity, have a chipped tooth, or want to discuss replacing older fillings, a simple evaluation can clarify your best options.


Call Aria Dental of Annapolis at (410) 280-5370 to Schedule a Consultation in Annapolis, MD.


Emergency Dentist in Annapolis: What Counts as an Emergency and What To Do Next

When Tooth Trouble Can’t Wait


A toothache always seems to show up at the worst possible time—right before a trip, in the middle of a work week, or late at night when everything is closed. Still, not every dental problem is a true emergency. However, some situations


do


need prompt care to prevent infection, stop pain from escalating, or save a tooth.


If you’re not sure whether to call an emergency dentist in Annapolis, this guide walks you through what counts as urgent, what you can do at home right away, and how emergency dental visits typically work at Aria Dental of Annapolis.

What Counts as a Dental Emergency?


In general, a dental emergency involves one of three things:

  • Severe pain that doesn’t improve

  • Bleeding that won’t stop

  • Infection, swelling, or trauma that could worsen quickly

Because mouth infections can spread and dental injuries can become irreversible, it’s better to call and ask rather than wait and hope it improves.

Common Dental Emergencies


Here are scenarios that usually deserve a same-day call:

  • A knocked-out tooth (adult tooth)

  • A broken or cracked tooth with pain

  • Facial swelling, gum swelling, or a “pimple” on the gums

  • Severe toothache or pressure that wakes you up

  • Bleeding after an extraction that won’t stop

  • A lost filling or crown with significant sensitivity

  • A bite that suddenly feels “high” or painful

  • Jaw injury or difficulty opening/closing

Situations That Are Urgent, But Not Always Emergencies


These still deserve attention soon, but they may not require immediate same-day treatment:

  • Mild sensitivity to cold that goes away quickly

  • A small chip with no pain or sharp edge

  • Food stuck between teeth that you can’t floss out (call if you can’t remove it safely)

  • A minor mouth sore that hasn’t lasted more than 10–14 days

Even if it’s not an emergency, getting guidance quickly can save you discomfort and keep the problem from growing.

What To Do Right Away: First-Aid Tips You Can Trust


When something goes wrong, the goal is to protect the area, reduce swelling, and avoid making the injury worse. Although these steps don’t replace professional care, they can stabilize the situation until you’re seen.

If a Tooth Is Knocked Out


Time matters. The best outcomes happen when a tooth is replanted quickly.

  1. Pick the tooth up by the crown only


    (the chewing surface), not the root.

  2. Rinse gently for a few seconds


    if it’s dirty—do not scrub.

  3. Try to place it back in the socket


    if you can do so easily.


  4. If you can’t,


    store it in milk


    or your own saliva (inside your cheek) and call immediately.

  5. Do not let the tooth dry out.

If You Have Facial Swelling


Swelling can be a sign of infection. In addition, a spreading infection can become serious quickly.


  • Apply a


    cold compress


    on the outside of the face (10 minutes on, 10 minutes off).

  • Take an over-the-counter pain reliever as directed (if safe for you).

  • Do not apply heat


    to the face, which may increase swelling.

  • Call promptly—swelling is not something to “wait out.”

If You Have a Severe Toothache


A toothache can come from deep decay, a crack, a failing filling, or infection. Meanwhile, gum irritation and sinus issues can sometimes mimic tooth pain.


  • Rinse with


    warm salt water


    (a teaspoon of salt in a cup of warm water).

  • Floss gently to remove trapped food.

  • Use a cold compress if swelling is present.

  • Avoid chewing on that side and avoid very hot/cold foods.

  • If pain is intense or lingering, call the office.

If a Crown Falls Off


A crown that comes off doesn’t always hurt, but the exposed tooth can be sensitive. Also, the tooth may shift slightly, making it harder to reseat the crown later.

  • Save the crown in a clean container.


  • If it feels comfortable, you can use


    temporary dental cement


    from a pharmacy to hold it in place.

  • Avoid superglue or household adhesives.

  • Chew on the opposite side and schedule a visit.

If You Break or Chip a Tooth


  • Rinse with warm water and check for sharp edges.

  • If there’s a sharp area, cover it with orthodontic wax.

  • Use a cold compress for swelling.

  • Call if you have pain, sensitivity, or a visible crack line.

When to Go to the ER vs. Call the Dentist


Most dental emergencies are handled best by a dentist, not an emergency room. However, the ER is appropriate if you have:

  • Trouble breathing or swallowing

  • Rapidly spreading swelling under the jaw or neck

  • High fever with facial swelling

  • Uncontrolled bleeding

  • A major facial injury (possible fracture)

In those cases, go to urgent care or the ER first. For tooth-specific issues—pain, cracked teeth, lost fillings, knocked-out teeth—calling a dental office is usually the fastest path to the right care.

What Happens at an Emergency Dental Visit?


If you’ve never had an emergency dental appointment, it helps to know what to expect. While every situation is different, most visits follow a similar pattern.

Step 1: Comfort First


We start by listening to what you’re feeling and how quickly it came on. Then we focus on getting you comfortable. That can include numbing, short-term relief medication recommendations, or targeted treatment to remove the source of pain.

Step 2: Diagnosis


X-rays may be recommended to locate decay, infection, cracks, or bone changes. If your tooth has a large crack or suspected nerve involvement, we’ll discuss the most predictable treatment options.

Step 3: Stabilizing Treatment


Depending on what we find, emergency treatment might include:


  • A


    filling


    or repair of a broken tooth


  • A


    temporary crown


    or cementing a crown back in place

  • Root canal therapy


    to treat infection inside a tooth

  • Extraction


    if the tooth can’t be saved

  • Antibiotics


    when appropriate (not for every toothache)


  • A plan for a


    follow-up


    restorative visit, such as a crown

The goal is to stabilize the issue and prevent it from returning.

Why “Just Antibiotics” Usually Isn’t Enough


It’s understandable to want a quick fix. However, most dental infections come from inside the tooth or around the root. Antibiotics can reduce bacterial load temporarily, yet they often don’t remove the source of infection. That’s why dental treatment—like root canal therapy, drainage, or extraction—is commonly necessary to fully resolve the problem.

In other words, antibiotics can be part of the plan, but they’re rarely the whole solution.

How to Prevent Future Dental Emergencies


While accidents happen, many dental emergencies are preventable. Small habits reduce risk significantly.

Keep Up with Preventive Visits


Regular exams and cleanings help catch cracks, leaking fillings, and early decay before they become painful. Additionally, gum evaluations help identify infection early.

Don’t Ignore “Small” Symptoms


A little sensitivity today can become a big problem later. If a tooth hurts when you bite or lingers after cold, schedule a check. Early care usually means simpler treatment.

Wear a Mouthguard for Sports


Even recreational sports can cause trauma. A custom mouthguard is more comfortable and protective than a store-bought version, especially for braces or past dental work.

Address Clenching and Grinding


If you wake up with jaw tension or notice worn edges on teeth, a night guard can protect teeth and restorations from cracks.

Avoid Using Teeth as Tools


Opening packages, biting nails, or chewing ice can weaken enamel and trigger fractures. If it feels “handy,” it’s probably risky.

Emergency dentistry is about more than pain relief—it’s about protecting long-term oral health. Prompt care can save natural teeth, prevent infections from spreading, reduce the need for more extensive treatment, and restore normal chewing and sleep. Just as importantly, having a clear plan after an emergency visit helps you move forward confidently instead of worrying about the next flare-up.

The Right Move If You’re Unsure


If you’re debating whether your situation is an emergency, call anyway. A quick conversation can help you decide on the safest next step. Meanwhile, remember that earlier care typically means less discomfort, fewer complications, and more conservative options.


Ready to get relief and a clear plan?


Call Aria Dental of Annapolis at (410) 280-5370 to Call Us Today in Annapolis, MD.


3D CBCT Scans for Dental Implants: Safer, Smarter Planning in Annapolis

See More, Plan Better


Dental implants succeed when planning is precise.


Cone Beam Computed Tomography (CBCT)


gives a 3D map of your jaw, teeth, and critical anatomy. Instead of guessing at width and angulation from flat X-rays, your dentist can measure bone in millimeters, evaluate sinus and nerve positions, and virtually plan the implant before the day of surgery. As a result, treatment becomes safer, more predictable, and often faster.


What CBCT Shows That 2D X-Rays Can’t


Traditional dental X-rays are invaluable, yet they flatten complex structures. CBCT adds depth, revealing:

  • Bone Width and Height:


    Essential for choosing implant diameter and length

  • Bone Density Patterns:


    Helpful for anticipating healing and stability

  • Nerve, Sinus, and Nasal Anatomy:


    To avoid critical structures

  • Pathology or Hidden Issues:


    Cysts, root fractures, or impacted teeth

  • Tooth Angulation and Root Proximity:


    Important near neighboring roots

Because we can scroll through slices of your jaw, we can spot potential obstacles before they become problems.

How the Scan Works


You’ll stand still while the scanner rotates around your head for a few seconds. The process is quick, comfortable, and uses a focused beam. Radiation doses are typically lower than medical CT scans because the field of view is small and targeted to the jaws. We always weigh diagnostic benefits against exposure and follow the ALARA principle—“as low as reasonably achievable.”

Digital Planning and Surgical Guides


CBCT data merges with digital impressions of your teeth or gums. Then, using planning software, we position the implant in the ideal location relative to bone and the final crown. From that plan, a


surgical guide


—a custom 3D-printed template—can direct the angulation and depth on the day of surgery. Therefore, placement is efficient, soft-tissue management is gentler, and the final restoration fits beautifully.

When CBCT Makes the Biggest Difference


  • Limited Bone or Anatomical Complexity:


    Narrow ridges, sinus proximity, or nerve loops

  • Multiple Implants or Full-Arch Cases:


    Where angulation and parallelism matter

  • Immediate Implants:


    Planning extraction and placement in one visit

  • Grafting Decisions:


    Determining whether you need a sinus lift or ridge augmentation

  • Mapping Old Infections:


    Ensuring sites are fully healed before placement

Comfort, Safety, and Privacy


We explain each step, verify your medical history, and answer questions before scanning. Additionally, we use lead shielding as appropriate and calibrate our systems regularly. Your scan becomes part of your secure health record, and we share findings transparently so you can make confident decisions.

What Patients Often Ask


Is CBCT required for every implant?


Not always, but it’s considered a best practice for most cases because it clarifies bone volume and anatomy.

Will this increase my costs?


There is a fee, yet CBCT can reduce surprises, prevent complications, and shorten chair time—often saving money over the course of treatment.

Does it hurt?


No. You simply stand still; the scan is noninvasive and takes seconds.

Benefits Section


CBCT-guided implant planning reduces risk by clearly mapping nerves and sinuses, improves accuracy with surgical guides, and helps select the right implant size for long-term stability. Moreover, because the final crown is considered from the start, your implant emerges in the correct position for easy cleaning, comfortable chewing, and a natural look.

After the Scan: From Data to Smile


  1. Review & Plan:


    We analyze your 3D images together.

  2. Mock-Up:


    You’ll preview the projected position and look of your future tooth.

  3. Guided Placement:


    On surgery day, the plan translates into precise, efficient placement.

  4. Healing & Restoration:


    As the implant integrates, we time your temporary and final crown for ideal esthetics and function.

  5. Maintenance:


    We provide cleaning tips and schedule follow-ups to protect your investment.

Ready for Clarity?


If you want implants planned with the latest imaging technology, we’re here to walk you through every step.


Call Aria Dental of Annapolis at (410) 280-5370 to Book an Appointment in Annapolis, MD.


All-on-4 Dental Implants in Annapolis: Your Full-Arch Guide

A Stable, Confident Smile—In Fewer Appointments


When many or all teeth are failing, traditional dentures can feel loose, limit food choices, and reduce confidence.


All-on-4 dental implants


offer a modern alternative: a full-arch bridge anchored by four strategically placed implants. Because the implants are angled to maximize existing bone, many patients avoid grafting and enjoy a streamlined timeline.


How All-on-4 Works


Instead of one implant per tooth, four implants support an entire arch. Two are placed near the front of the jaw where bone is densest; two are angled in the back to engage strong bone and avoid anatomical structures. After placement, a provisional (temporary) fixed bridge is typically attached the same day or shortly thereafter. Consequently, you leave with a stable, attractive smile while the implants integrate.

Who’s a Candidate?


You may be a candidate if you:

  • Have multiple failing teeth, severe wear, or non-restorable decay

  • Struggle with a loose or uncomfortable denture

  • Have adequate bone for strategic placement (often even without grafting)

  • Are seeking a fixed, non-removable solution that looks and functions like natural teeth

  • Can commit to diligent home care and maintenance appointments

A 3D scan (CBCT), photos, and a comprehensive exam confirm candidacy and allow precise planning.

Step-by-Step Timeline


  1. Consult & Planning:


    Records, digital smile design, and a review of goals.

  2. Implant Day:


    Teeth are removed if necessary; four implants are placed in each treated arch.

  3. Immediate Provisional:


    A custom temporary bridge is attached so you leave with fixed teeth.

  4. Healing & Integration:


    Over the next few months, implants fuse with bone while you enjoy stable function.

  5. Final Bridge:


    After integration, a strong, lifelike final bridge is crafted for long-term performance.

What the Bridge Is Made Of


Provisional bridges are often high-quality acrylic or composite, chosen for comfort and ease of adjustment. Final bridges may be reinforced acrylic, zirconia, or hybrid designs. Your bite, esthetic goals, and budget guide material selection; meanwhile, we’ll review pros and cons of each before moving forward.

Benefits vs. Traditional Dentures


  • Stability:


    Implants anchor the bridge, so it won’t rock or shift.

  • Chewing Power:


    Enjoy a wider range of foods with more confidence.

  • Bone Preservation:


    Implants stimulate bone, helping reduce the “sunken” look over time.

  • Speech & Comfort:


    Fewer bulky flanges and improved phonetics for many patients.

  • Convenience:


    Fixed teeth simplify your day—no adhesives or nightly soak routine.

Hygiene & Maintenance


Although the bridge is fixed, hygiene is straightforward with the right tools:

  • A water flosser and superfloss or interdental brushes to clean under the bridge

  • A soft toothbrush and low-abrasion toothpaste

  • Regular professional maintenance visits (typically every 3–4 months the first year)

  • Night guard use if you clench, which protects the bridge and implants

Cost, Financing, and Value


All-on-4 is a significant investment, yet it consolidates multiple procedures into a single, efficient plan. Insurance may contribute to portions, and flexible financing helps fit treatment into your budget. When you weigh the stability, chewing confidence, and long-term health benefits, many patients consider it life-changing value.

FAQs From Annapolis Patients


Will I be without teeth during treatment?


Typically, no. The goal is to place a provisional bridge right away, so you leave with fixed teeth.

Does it hurt?


Most patients are surprised by how manageable the procedure feels and describe post-operative soreness more than pain.

What if an implant fails to integrate?


While success rates are high, we plan contingencies. A replacement implant or a modified distribution often solves the issue.

Benefits Section


All-on-4 compresses a complex full-arch problem into a coordinated solution. It stabilizes your bite, improves chewing efficiency, and supports facial contours by maintaining bone where it matters. Just as important, patients often report a renewed willingness to smile, laugh, and participate socially—benefits that ripple into everyday life.

Take the First Step


If you’re exploring a fixed alternative to dentures, we’ll guide you through options, timelines, and materials—no pressure, just clarity.


Call Aria Dental of Annapolis at (410) 280-5370 to Schedule a Consultation in Annapolis, MD.